Getting confused with Foo the Fox

I've just had a weird thing happen. I've been working on some ideas for a couple of characters called 'Foo and Bah' (Foo, a small intelligent fox and Bah! his muscle bound bodyguard sheep. I'd been drawing the Fox character for a while and I was getting frustrated as I couldn't get a feel for his anatomy. I wanted to keep him basic and cartoony and as usual I was over-engineering his anatomy. I really do struggle keeping to basic shapes. Where some designers will put in a stick for an arm and it works perfectly I try to put in the full anatomically correct arm with bones, muscles, fat etc. I kept on drawing the Fox over and over and I seemed to keep coming back to the same basic shape and it just didn't feel right for me.

I was about to Google for some reference images and then thought I'd quickly model a fox with primitives in 3D and then spin it around to get the form or silhouette locked off. I opened my favorite modeling package and threw down some boxes and spheres in no particular order. I messed around with them for a few minutes and started to get a basic Fox shape together. Before I knew it I'd gone from primitives into detailed modeling, added a few colors that suited the Fox and started trying out different poses and facial expressions that I had struggled with in the pencil sketches. In no time at all I'd hit upon the right design and I was happy that the anatomy was right for this project.

It is quite liberating to do your concept work in 3D, trying out different shapes, making scale changes to limbs, trying different expressions etc. I used my 3D model as a drawing reference and sketched out five or six different turnarounds and I was pretty happy with every one. I chose one and inked it, scanned it in and did some quick Photoshop coloring.

All done I thought. I'd nailed the concept via a very unusual concept process. Now all there was to do was to use the reference image and make the 3D model....oh..wait...I already did that bit!. Doh! Very confused.com

EDIT:

Added his partner in crime tonight the evil henchman of the piece, 'Bah! the Sheep'. Be VERY careful tonight as Foo & Bah are after your Easter Eggs! Guard them with your life! If you haven't scoffed 'em all already. Happy Easter!

___________________________________________________________

Help me out with screen shots.


If anyone wants to help out I'd be ever so grateful. I want to put a screen shot and some images of all major 3D packages and wondered if anyone felt like contributing. I'm updating my old Sub-D Primer as part of my new Enter3D area and I would like to show some examples.

I'm looking for:

1. An interesting screen shot of your 3D program of choice
2. A wire frame shot of one of your models
3. A render if poss.
4. A few words about why you like the package in question.

Zip them up and fire then over to glen.southern@southerngfx.co.uk

Bear in mind that the Enter 3D site is aimed at 2D artists coming to 3D for the first time. What would you show or say about your favorite 3D package?

And if you REALLY love your 3D package, do a little video and send it to Youtube and fire me the link. Now that would be cool!

So far I'm looking for:

Silo
Blender
Wings3D
Lightwave
Modo
Maya
C4D
3DSmax
XSI
Mudbox
ZBrush
3DCoat

and I'm open to offers to add the ones I've missed.

If you look at the Primer Page 2 you'll see where this is going.


Thanks already to Warner for some Modo images and Dave Bates (as ever) for sorting out the scripting for me.

___________________________________________________________

Entering the Third Dimension (NOW OPEN)


Are you finding that your sketch books are overflowing with characters these days? Have you been wondering what some of those character would look like if they were a little more three dimensional? Well come on in and Enter the Third Dimension....

Q&A

Whats this Enter3D stuff then?

I've been doing tutorials and 3D training videos for a long time now. I've been working with more and more 2D designers and especially 2D character designers. More and more people have been asking about how to get their concepts into 3D. This new area of my website is designed to help.

What will I find there?

Help and support for one thing. I want to help anyone new to modeling get a feel for how subdivision modeling works and how to learn the basics. The new area of the site is broken down into:

An Introduction
The Basics
Some Projects
A Subdivision modelers Primer

I will use this framework as a place to keep my future tutorial videos. If you have specific requests then please feel free to add comments in this blog post.

Is it finished
?

Nope. Not by a long way. I've been getting help and feedback from some amazing designers and I've been given some amazing character designs to use in future tutorials. The site is there as a resource for future modelers and a place to add new video content as I produce it.


Thanks have to go to Wes and the KURV guys who host all my stuff. The ever supportive Nevercenter Silo team for sponsorship and encouragement. For help with or for providing character designs and reference images James Yeah!, Moopf, Tado, Steve Cairney, Steve Talkowski, George Coghill, Lawrence Basso and many more to come. For constant advice and reality checks Wayne Robson, Dave Davidson. The multi-talented Glenn McGuire at Sparkle Media and Anthony Fillice my business guru and life coach. Oran Parker for design feedback. What would I do with out you all and the hundreds of others who I have the pleasure of interacting with on a daily basis. Thanks!

Follow me on twitter for updates.
___________________________________________________________

Entering the Third Dimension

I've been working on a new area of my website for a few weeks now. It's a new tutorial area and I'm hoping to fill it up with training videos over the next few months. For about a year now I've been taking commissions for toy work, both commercial jobs and fun projects. I've spent a little time improving my vector skills and even done a few physical sculpts from ideas that I've really liked.

I decided to set up the new tutorial area in response to lots of emails I've had from 2D artists who want to make the leap into 3D, hence the title 'ENTERING THE THIRD DIMENSION.' Rather than focus on one specific program the videos are made using a range of applications that do a wide variety of things e.g. Silo for modeling, Headus UV for adding UV's, Cinema4D for rendering, ZBrush for sculpting and texturing etc.

I've asked a few fellow artist to let me use their images and characters as reference material so I should be able to show how to make a wide range of characters and creatures and show lots of different techniques along the way. I want to keep adding to the new area in coming months so I've made it expandable.

The tutorials are broken down as follows:

-Preparing a concept image
-Getting the reference image in the viewport background
-Subdivision basics
-Box modeling v point by point
-Using primitives to build shapes
-Modeling in parts and managing objects
-Using material sets to color your characters
-Creating UV co-ordinates
-Creating a texture using a UV map
-Lighting and rendering

Project videos:

1. Basic Penguin toy character using box modeling.
2. Point by point modeling a small character from vector reference.
3. Using primitives to form a character and scene (Artwork by Moopf).
4. Using text in your creations (Artwork supplied by Steve Cairney).
5. How to UV map a complex toy model using Headus UV
6. Sculpting a toy with ZBrush
7. Setting up a toy product shot in Cinema 4D.

I'm hoping to open the new website area by the end of the month and I'll blog and twitter when it's released.


___________________________________________________________

New SouthernGFX Ident logo


I settled on my ident design. A big thanks to Wayne Robson, Glenn McGuire and Oran parker who gave me either inspiration for this little project or design ideas. I decided on the compass point idea for a number of reasons:


1. It's very simple and as a stand alone shape it can mean lots of different things.
2. The link to a compass point (pointing south) is a reference to my name. It doesn't look so much like a compass point in it's final form that it becomes cliched (Like a rip off of the Safari logo for example).
3. The shape has ended up looking like an alien (sort of) which gives me the link back to my work
4. I tried the shape out on a card, pin badge and as a web icon and it seemed to work well in all formats.


I'm not overly worried about colors at this stage. One of my first design sheets focused on getting the colors right before the shape. I realized that the color should be secondary to the symbol and that I may be changing the color to suit the medium anyway eg. black and white on cards, greenish tint to suit the website etc.

___________________________________________________________

January roundup

I always try to end a year with a clean up of the website and hard-drives so that I can hit the ground running in January. For some reason I was a little late this year and only got round to it three weeks into the new year. It's a little different this year actually as in 2009 I switched over to 100% Macs and and 100% external hard-drives. No more Windows in nice and the thought of less OS installing and fighting viruses is just liberating. I wonder what the addition of a new Apple Ipad with bring to the party in two months time.

Ok, projects in January. Things started out a little slow for the first two weeks. I carried on learning to handle Cinema4D and just added to my skill set. Before Xmas I hooked up with Sparkle media on a new project to provide a character modeling service under their Sparkle Media banner. One of the first pitches was for a female Werewolf. The pitch went in and the last I heard they were down to the last 4 so fingers crossed. I've just updated my Linked-In profile to reflect the work I've been doing with Sparkle. After some discussing I've gone with the slightly grandiose title of 'Creative director'. Here's hoping I can live up to the job!

If you need character/creature modeling and animation work doing, contact Glenn at Sparkle.


For some time now I've been wanting to firm up my brand image I've been toying with the idea of developing an icon or ident to use on my websites, blog, cards, pin badges etc. I asked a few friends and designers for some tips and came up with a few ideas. The recuring idea seems to be linking my name, SOUTHERN, in with the design. I've tried the whole Southern Kanji idea in the past so that was a non starter for me. I decided to go with the South compass point reference. Here's my first sheet:


___________________________________________________________

MonkiTubes model and sculpt

Back in September I started working on a toy project with the intention of taking it from design to a finished resin cast. I also wanted to find a good solution to get good product renders of the toy designs. I'm really happy to be using Cinema4D now to get the sorts of shots I want but I thought it was time to move the whole project forward again.

My latest design is a re-hashed version of my Peg toy called the MonkiTubes. Very simple geometric shapes with clearly defined body parts including feet, upper and lower body, ears and a strong tail. I'm still very much in a design stage here but I'm getting closer to a shape that I like.


These tests all have strong personalities even though they have the same underlying shape and that is down to textures and graphics.I want to work on the shape a little more now as I would love to be able to cast these guys in a single mold. I had a rapid prototype done of my T-Rawll creature earlier this year but I think I will try and do this one with sculpey or wax.


___________________________________________________________

CGTweetup and the dreaded lurgy

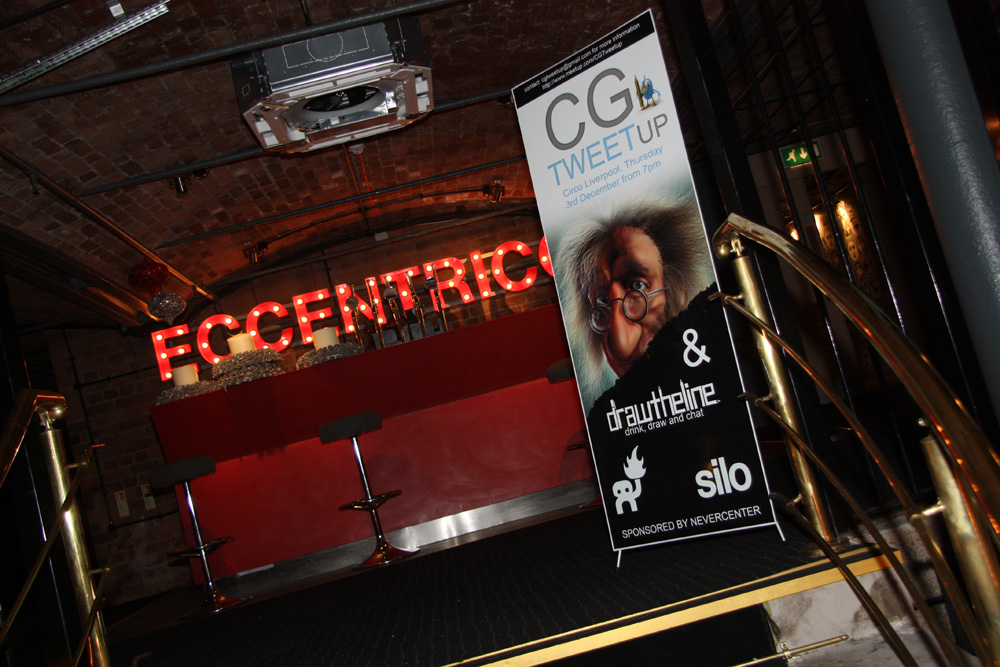
We held our December CGTweetup on Thursday 3rd December in Circo at the Albert Dock. This time we had a joint event with the cool guys from Draw-the-line and we were blown away by the attendance which topped sixty people. I put up a small gallery of photographs of the event taken by my photographer friend Gary Woodward.


A big thanks to our sponsors Nevercenter and also to the guys a Ballisitic Media for providing prizes. We're looking into doing our next event in February sometime and of course there is always the regular Draw-the-line event in Django's Riff on the first Thursday of every month.

I've asked Mike at Draw-the-Line if I could design one of the event flyers. I spend so much time doing 3D and I love getting to do 2D stuff. I made a start (ignore the dates on this one):


___________________________________________________________

Learning character/organic modeling in Cinema 4D


This is my third week using Maxons Cinema 4d and I've been posting my thoughts and first images all over the place. I thought it was about time I brought all my comments together in one place. I've started a thread at CGT that covers all this off and I'll continue to post my findings as I get more familiar with the software and toolset.

First things first. I have not abandoned Silo3D in any way. In my eyes it is still the best value sub-division modeling package on the market. I explained why I was moving over to Cinema 4D in this blog post here. I have spent a long time working with Silo as my main modeling solution and it will take a very special piece of software to make me move on.

A large amount of my first few weeks with C4D has been spent configuring the layout and shortcuts to suit my needs as an organic character/creature modeler. I wasn't thinking about getting heavily involved with the modeling tools at first but as the days rolled on I started to like the toolset and more-so the configurable palettes and layouts. Add to that the power hidden in the scripting and the ability to add those scripts to buttons and the modeling experience becomes very attractive. I remember doing all this with Maya back in version 6.5 but I have found C4D much easier to learn and therefore I want to keep going.

Lots of tools work as you would expect. A character modeler
needs a different set of tools from hard surface modeler. For example I can't remember the last time I used a Boolean operation. The common tools that I use in most 3D modeling packages work as expected including things like extrude, move/scale/rotate/face/point/edge/face/object etc. All very familiar and quickly mapped to my own liking. There are a few quirks and oddities that frustrate me but most can be overcome with tweaks, scripts or plugins.

Symmetry. For a character modeler one essential feature is having the ability to model with symmetry on and all central point to be locked to Zero on X. This is a 'given' to successfully model creatures, characters and heads. In R11 I've only found a symmetry tag which gives me a partial answer but I had to resort to two plugins to get what I needed. Symmetry clamp and Cactus Dans CD Symmetry had what I needed.


Selection of Tri and NGons. Towards the end of a modeling project I like to clean up the mesh removing Ngons and Tris. I have a process where I model a section (an arm for example) then check it and remove what I can using tools like spin quad (an old Lightwave term and favorite of some) or by deleting edges and cutting new ones. Then onto the body, check it, remove what I can etc. If you get into a habit like this you end up with very few stray 3 and more-than-four sided polygons to deal with at the end of a session. I still live by the mantra that the only good mesh is 100% Quadrangles. It is so frustrating to be nearing the end of a mesh and find that you have a stray triangle sitting right on the botton of a foot. To remove it you have to split all the way up the leg giving unwanted edges and poygons. It's much better to keep checking for Ngons and Tris throughout the modeling process and eliminate them whenever possible. To do this quicky and efficiently I like to have the two buttons at hand and mapped to keys (Alt+T and Alt+N)

Select NGons was from Bobtronic here

Select Tri's suggested by VDP at CGT :)

var cnt = op->GetPolygonCount();
if(!cnt) return;

var i;
var poly;
var bs = new(BaseSelect);

for(i=0; iGetPolygon(i);
if(poly->c == poly->d)
bs->Select(i);
}

op->SetPolygonSelection(bs);


Knife. This is a powerful tool and one that I loved in Lightwave and missed in Silo. However, to make it a fast and efficient addition to the toolkit I recorded a couple of scripts with the knife tool with certain settings switched on for example:

1. A Cut button and keycommand (X) which gives me the point to point or edge to edge cutting.

2. The Loop cut button which gives me the full split loop function.

These are all there to be had in the Knife attributes but having them on buttons and keys speeds the modeling process up. You can of course just double click the button to call the tools attributes then adjust them to get the desired effect but, again, this slows down modeling. To keep the processing flowing and more artistic these tools need to be accessable and available at the click of a button. One thing that slows a new modeler down is remembering which menu a tool is located in.

Knife Tool in Loop Mode:
CallCommand(1016030); // Knife
tool()#MDATA_KNIFE_MODE=2;

Tweak. The definition of tweak (for me!) is the ability to move componant parts (point, edge and face) in 3D space without having to select them first. In C4D you have to enter Tweak Mode and leave Default mode. Then when you've finished the tweaking go back to default mode. I am mush more comfortable having Tweak assigned to a Key hold so that you can quickly enter and leave the mode with the press/hold of a key. An analogy I use is that if you were writing a book you would not want to repeatedly press CAPS LOCK on and off all the time when you could simply hold down Shift for a capital letter. To improve things slightly I recorded a script that enters Tweak mode and also enters move mode. It only saves a single keystoke but you do use tweak with Move for 90% of the time.


Brush increase and decrease. This is a must and was achieved with a simple script from here. I much prefer mouse-wheel-roll for this sort of stuff but that is not implemented in the latest release. I got it here

Smooth (Average vertices): This is a vital modeling feature for me and it took me a while to get familiar with it in C4D. My favorite way to do it is to have a selection with an area effect and fall off (example: Select a nose and the effect falls off onto the face). Once selected I like to call the smooth command using a mouse wheel roll to run it incrementally. This isn't available in C4D so I use a combination of things to achieve the same effect. I use Live select in edge or face mode. Select the area I wish to tighten then call Brush>Smooth from my palette and click the area. This tightens the mesh giving the smoothing effect in the selected area. The other way is to call and use the 'Iron' tool. This is pretty much a tighten/average verts command but it feel clumsy at first.

Using the HUD. The HUD allows you to add certain menu items to the viewports. I like to add relevant sliders (Soft selection radius being a well used example) to a viewport to keep things flowing. You can save the document as template.c4d and that retains these HUD items but I'm still undecided if that's the best way to do it. The jury is out on this one so far as I am finding new and better ways to do this every day.

Retopogise: This is a great little script (a few lines of code is all that's needed) from Thomas Paleka at CGTalk. This little retop feature gives me a powerful little tool that allows me to generate my new geometry onto an existing high poly mesh. This is the best way to make clothing that fits a character and change bad edge flows. It is essentially the create- polygon tool with added oomph!!!

Loop and ring select. These work well and are well used.

Extrude/Smooth Shift/Matrix extrude all work perfectly and have lots of settings. I keep them handy in my modeling palette and have them mapped.

I intend to keep adding to this blog post so please check back if you are new to C4D. Please add your comments/additions/amendments below if I've missed something or you know of a great tool for organic modelers in Cinema 4D.

I need to say a massive thanks to everyone at CGTalk and on Twitter that has supported me in learning Cinema4D in recent weeks. And a couple of special thanks to Rob Redman from Pariah Studios. His tutorials have been a godsend. And to Dave Davidson who has put up with me pestering him for years now. Follow these guys all on twitter! It's well worth it!

___________________________________________________________

Draw the Line time again!


"Draw the Line" is a growing creative Liverpool art social event aimed at the everyman and artist alike to unite under one roof and enjoy a casual scribble.

Check here for information on upcoming events, look at photos from previous sessions and spot your own artistic contributions. Stay tuned and get involved.

Next Events:

Thursday 5th November - Django's Riff - 8PM onwards

Remember Remember the 5th of November, as we'll be having a

little give-away bonanza of some Art software DVDs

generously provided by Glen Southern, don't miss out!

Thursday 13th November - The Masque - 10PM onwards

A new and exciting venue to add to the list of places most doodled,

cheers to "Eat your Greens" for the invite!


___________________________________________________________